Do you remember the giant T-rex in Jurassic Park, the “bullet time” effect in The Matrix, or the cool and insane transforming and fighting scenes in hero movies? If so, you definitely know how overwhelming and immersive these scenes are. That is where the CGI effect is functioning.
Though tech-intensive and somehow intimidating, CGI is not exclusive to professionals. With the correct tools, you can also make your CGI videos. Without any further ado, let’s get into the breakdown and learn how to make CGI videos in traditional and creative ways!
- On This Page
-
What Is CGI Video & How Does It Work?
-
Comprehensive Guide: How to Make CGI Videos
Part 1. Build Models for CGI Video
Part 2. Add Surface Details for CGI Video Character
Part 3. Rigging & Animation
Part 4. Rendering Your CGI Video
Part 5. Compositing The CGI Video
-
CGI Video VS AGI Video
-
How to Generate CGI Video with AI in Just a Snap
What Is CGI Video & How Does It Work?
If you want to know how to make CGI videos, then “What is CGI effects?” and “How does it work?” are necessary before you hop on it.
CGI, Computer-Generated Imagery, refers to using computer software to create/enhance the visual content. This tech is widely used in films, video games, ads, etc. When it comes to CGI today, sometimes people are referring to visual video effects, like fake bombing done in post-production.
To put it briefly, the core process of making a CGI video features the following:
- 3D Modeling: building 3D objects, like characters and environments, from basic shapes.
- Texturing: surface details, colors, patterns, shading, and lighting, to add realism.
- Animation: rigging, motions, movements, actions, etc., for storytelling.
- Rendering: transforming the 3D scenes into 2D video frames for the final look.
- Compositing: combining all elements into a complete, cohesive video.
Comprehensive Guide: How to Make CGI Videos
Creating CGI videos is indeed a delicate process that requires tech, sophisticated software, time, and labor, if done in a traditional way. How do professionals make CGI visuals? Usually, they take advantage of some professional visual software.
Here in this section, you will learn the steps to create CGI video from modeling to compositing.
Part 1. Build Models for CGI Video
Knowing what content to make (your story, scenes, dialogues, etc.), you can now create your characters and environments. Generally, Blender, Maya, or Cinema 4D is used in modeling. Here, let’s use Blender.
Step 1. Start Blender > select the default cube > enter Edit Mode.
Step 2. Enable Clipping and build your character or environment object by editing the points, edges, and faces.

You may use the Mirror Modifier in building a model to save effort.
Step 3. Enable the Subdivision Surface modifier to smooth the faces of your model.
Screenshot from YouTube video v=9xAumJRKV6A by @PIXXO3D
Part 2. Add Surface Details for CGI Video Character
With your 3D model prepared, you can now add texture to it to make it more realistic; for instance, the skin texture, clothes wrinkles, medal shading, etc. You may use Blender Shader Editor, Vertex Painter, UV Mapping, or Substance Painter for this part.
Step 1. In Blender, using Vertex Painter, choose colors and use the brush to set the basic skin tone for your character.
Step 2. Add texture shading to the skin, clothes, or any surface to bring details and realism. E.g., add small pores, marks, freckles, or more to make it natural and real.
Step 3. Set up shaders for how light interacts with the surface of your character.
Screenshot from YouTube video v=IEQ7IVPwwQk by @KennysArts
Adding wrinkles also helps you build your character better; imagine you are applying an aging filter, and it helps add a sense of story.
Part 3. Rigging & Animation
With your character properly colored and textured, you are ready to bring life to it by adding bones and animating it. Maya, Blender, C4D, 3ds Max, and more are all optional, but here, we will still use Blender.
Step 1. Shift A > Armature > Single Bone.
Step 2. Press Tab to enter Edit Mode > press G to let the bone point to the ground > make other bones one by one to the hip, each part of all limbs, and the spine. Make sure all bones follow the right hierarchy. With one side of the bones ready, select them and click Symmetrize.
Step 3. Select the mesh > Armature > Ctrl P > with Automatic Weights to skin your mesh.
Screenshot from YouTube video v=jIwrswJEFBQ by @richstubbsanimation
Since now your character is movable, and you are prepared with your script and story, you can move on to animate your character, whose process is way different from animating a picture.
Step 1. Add a timeline window, move or make actions to your character, like lifting the foot, and add a keyframe. Add keyframes to all key actions.
Step 2. Add a new Dope Sheet window, retime your animation (make it on a linear curve) to make it more natural.
Step 3. Adjust the length of each action you want to make it more natural and lifelike. Use the Graph Editor to tweak your animation.
Find a real human action video as a reference, be it from making your character dance, or letting it run and fight, references help you keep onto realism.
Part 4. Rendering Your CGI Video
With all ready, you need to export the animation as videos. Blender, Maya, c4D, Lumion, Arnold, and more utilities are helpful in this step, and let’s stick to Blender, so that you can save time for learning a new app.
Step 1. Enter Rendering mode > choose Cycles as Render Engine.
Step 2. Use HDRI or add lighting and environment materials > add a background.
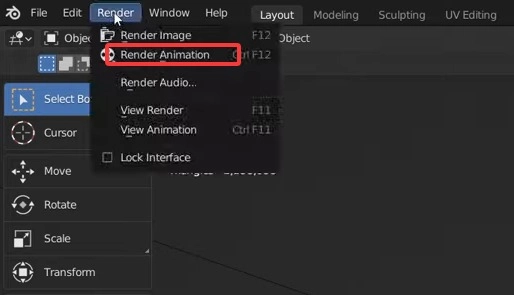
Step 3. Add a camera > choose ratio > adjust the perspective and any detail > set Frame Range (e.g., 1-250) > choose file format > Press F12 or click Render on the toolbox > Render Animation.
Part 5. Compositing The CGI Video
To enhance your CGI video, compositing is essential and indispensable for mood building and storytelling. Here, After Effects will be an ideal helper.
Step 1. Start AE > import your footage output from Blender, and other materials.
Step 2. Use Motion Tracking to focus on the main object, which is also helpful when you want to overlay face on video.
Step 3. Then, add mood-building elements like haze, fog, shock wave, booming smoke, fog, and also camera tricks like motion blur, lens flare, camera shake, etc.
CGI Video VS AGI Video
Yes, let’s be honest: creating a CGI does cost a lot of your time and effort. During the whole journey, you may run into problems or challenges that stop you from moving on.
Boom, it’s where the AI CGI video maker comes to shine. Making CGI visuals in traditional ways and generating AGI (AI-generated imagery) videos, which one is better? Check how they are different.
| |
CGI Video |
AGI Video |
| Cost |
Labor-intensive; may require a subscription fee for certain software |
Cost-effective; free AI apps, or some may require a subscription fee |
| Time Required |
Long; all processes require time |
Quick; only take seconds to minutes for a short video |
| Output Length |
Customizable, according to personal/project needs |
Short, often 5-20 seconds |
| Key Tools |
Blender, Maya, C4D |
AI text/image to video tools |
| Customization |
High, editable frame-by-frame |
Limited; Difficult to edit frame by frame after generation |
| Visual Result |
Depending on personal skills; can be hyper-realistic |
Sometimes surreal, distorted, depending on the models |
How to Generate CGI Video with AI in Just a Snap
Just as aforementioned, creating CGI visual in normal and traditional ways can engulf you large amount of time, and you will have to throw tons of your sweat and effort into it from learning and practicing. Why not give AGI video a try?
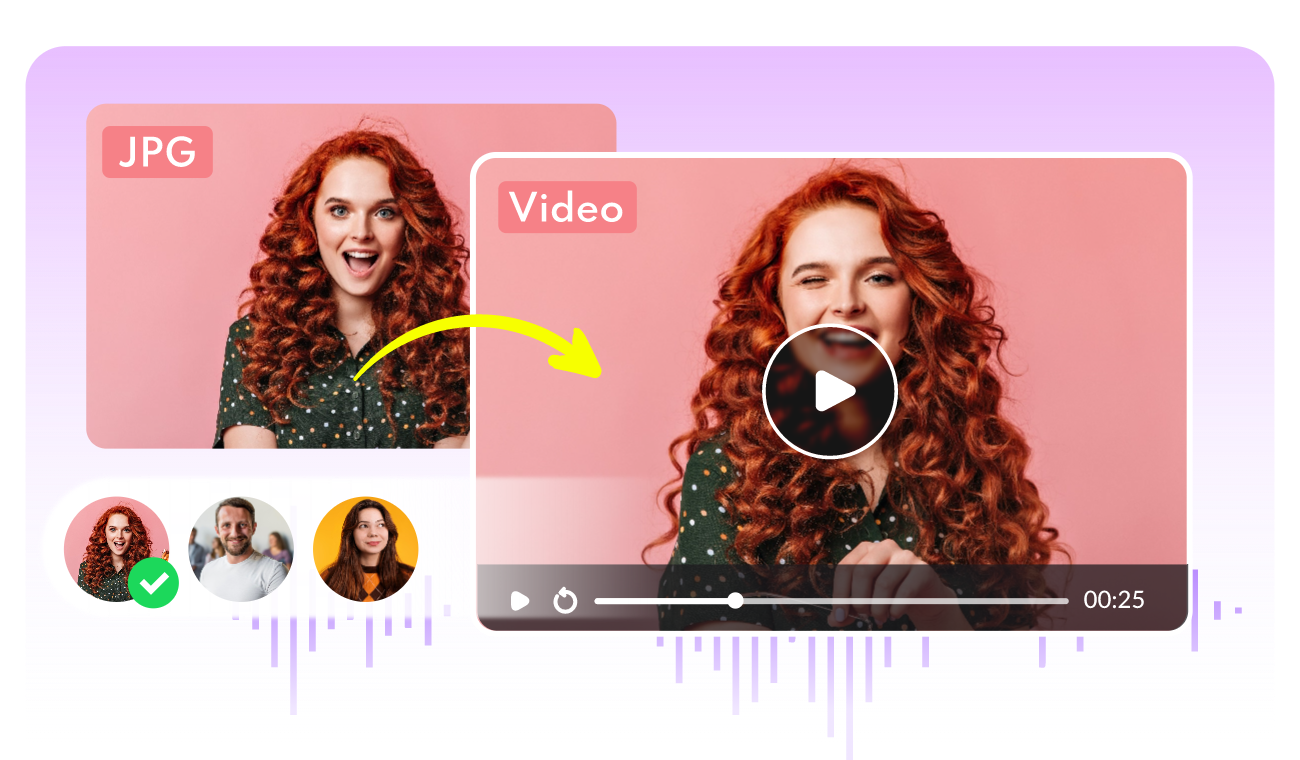
Vidnoz Gen will be the one you should never miss. This one-stop visual creator helps generate base CGI images from your text prompt. Next, using its image-to-video tool, you can further process the base image and turn it into a cohesive and visually pleasing CGI video.
Convert Image to Video AI Online - Free
- Create a video from an image quickly for free.
- Use various AI models to turn photos into videos.
- Download and share the AI-generated video at no cost.
Convert Image to Video
Key Feature
- Generate CGI Video from Zero to One: This AI CGI video generator supports creating images from text, and then from image to video/text to video; thus, you won’t need to prepare any material except for your script and story.
- Hyper-Real CGI Video Models: CGI video maker AI provides 3 models, generating high-quality video with precise movement, detailed, and lifelike texture.
- Preset Video Effect for Stunning Visuals: Diverse video effects out-of-the-box bring various and vivid visual effects: you can make AI kissing videos for couples, you can melt everything, turn a car into a balloon, etc.
- CGI Video Free for Commercial Use: All CGI videos made with this AI CGI video generator can be used for commercial purposes for free, adding spice to your CGI video creations.
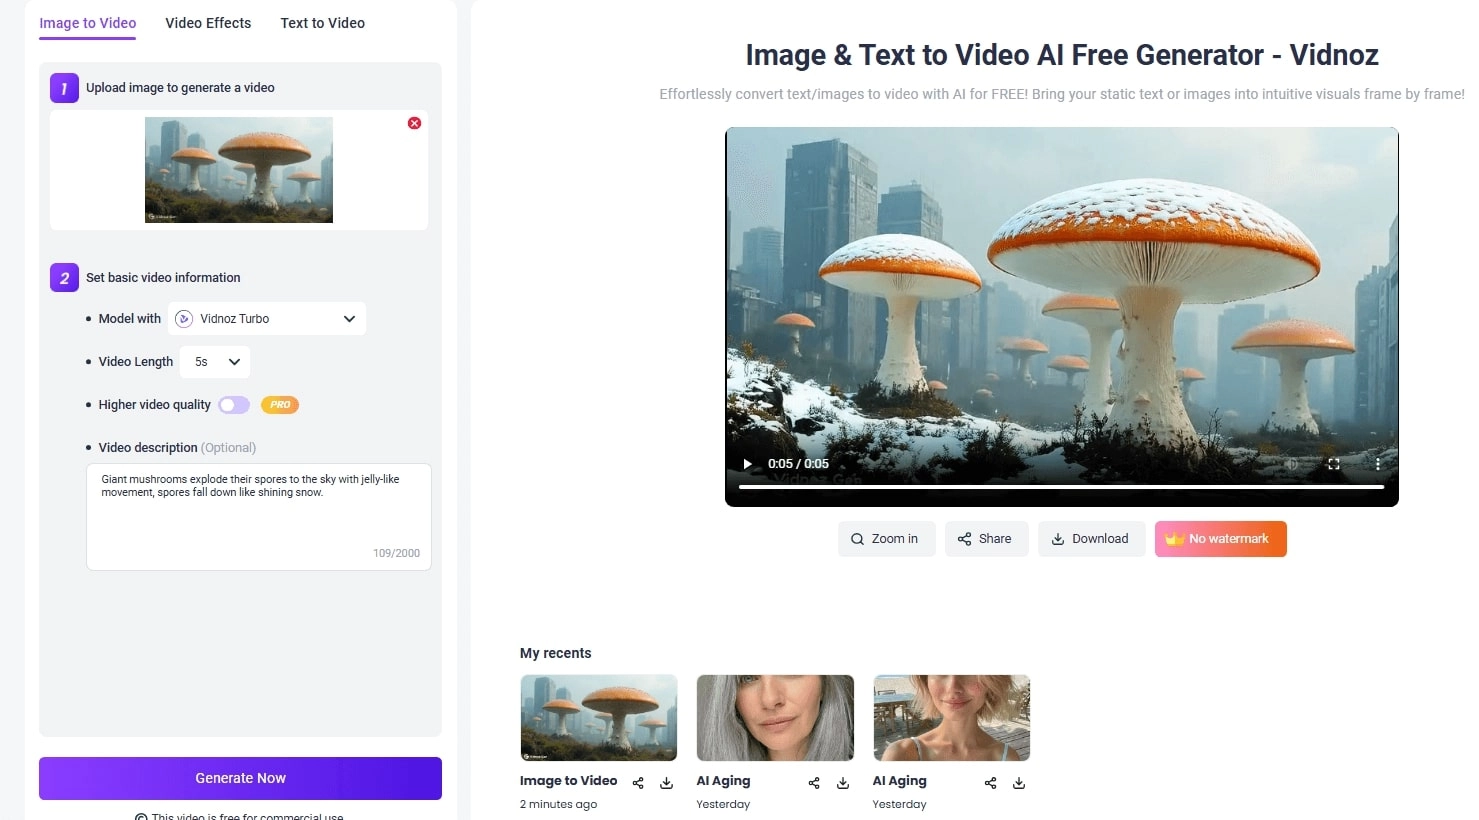
How to Make CGI Video with AI?
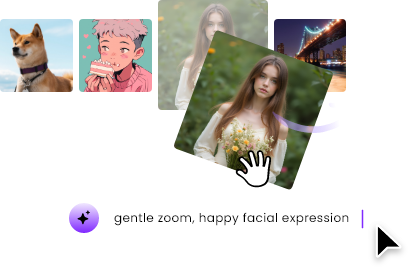
Step 1. Base Image
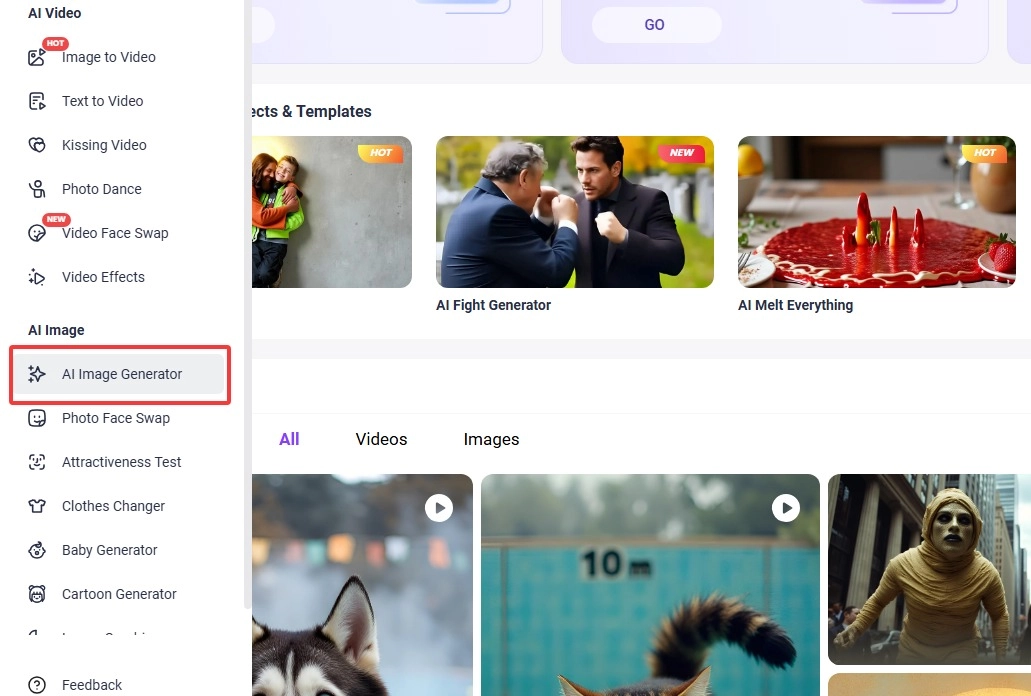
Make a base image for CGI visual first. Go to the Vidnoz Gen homepage, find the AI Image Generator from the toolbar.
Step 2. Image Generation
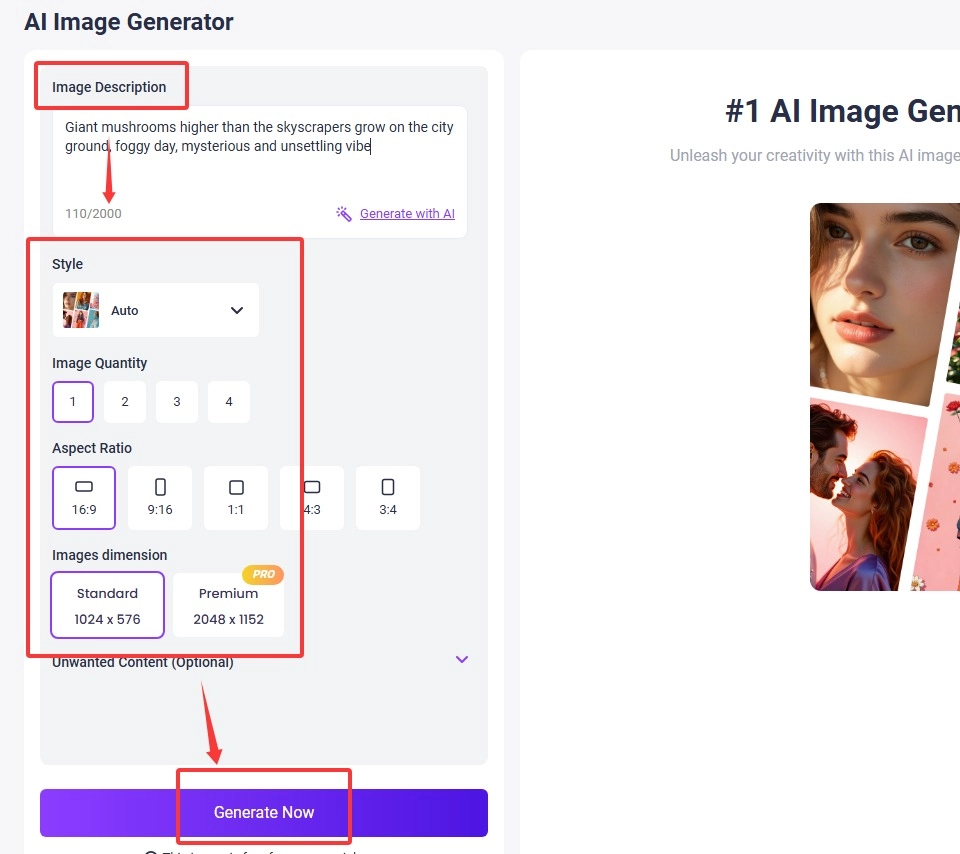
Input your idea or the scene you want, choose a style/model, customize the numbers, Aspect Ratio, and hit Generate Now.
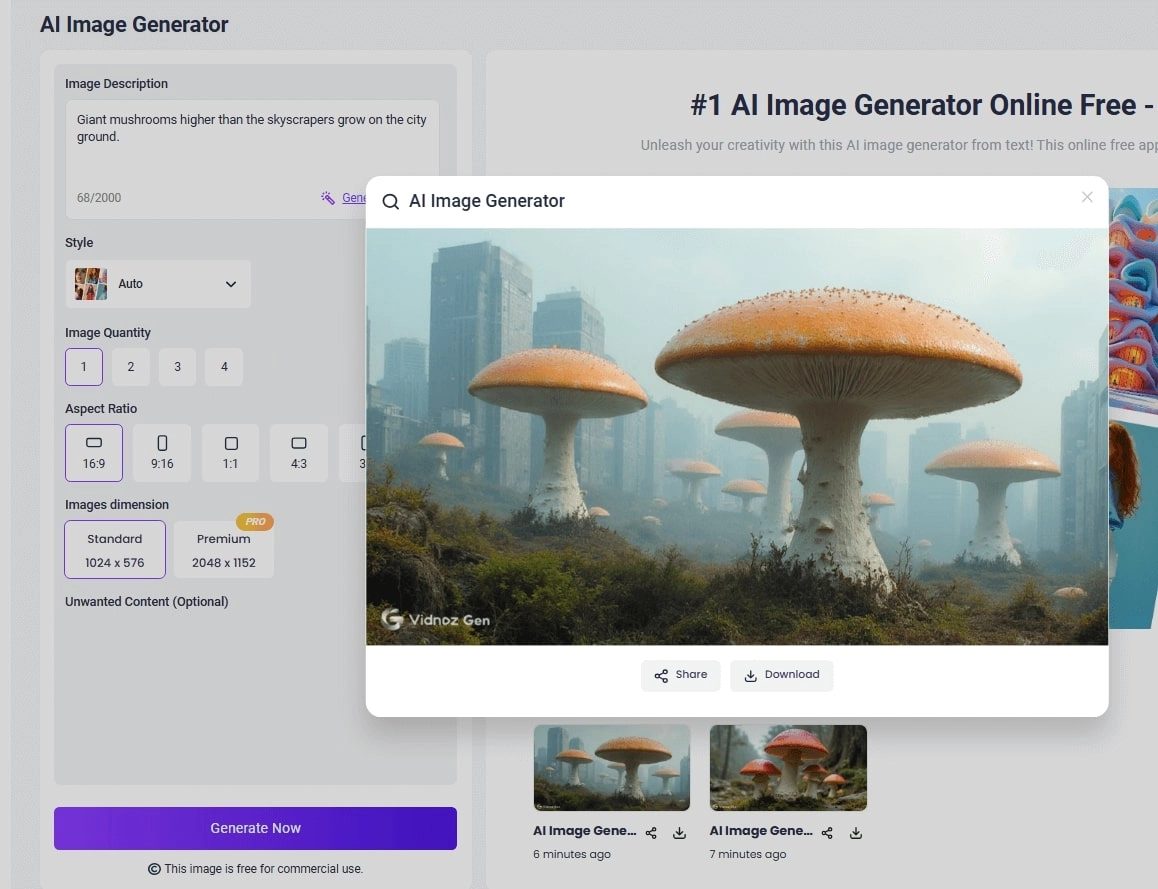
Then you will get the base picture you want. Download it.
Step 3. CGI Video Creation
Move your cursor to the side toolbox > find Image to Video > upload the base image and describe the video content you want, then click Generate Now. Minutes later, you will get the AI CGI video.
This is how you use this CGI video maker AI for compelling CGI creation. Feel free to check, download, and share the result.
Final Thoughts
Creating a CGI video isn’t the preserve of gurus and artists alone. If you feel challenged to learn Blender, Maya, and similar professional software, put your eyes on AI CGI video generators, which bring 1-click, consistent, and convincing CGI video effects at a fraction of the cost. Try using the versatile Vidnoz Gen provided by Vidnoz's free AI video generator for AGI video making; it won’t let you down!