Turn still images or text into dynamic videos in any style, with leading AI models readily. Try the smart AI video generator now - stunning, free, and instant!
An Ultimate Guide on How to Record Lectures for Students
Tim Henderson
Updated on
SHARE THIS POST
Learn how to record lectures with this ultimate guide, including forehand preparations and a hands-on tutorial.
The use of recorded video lectures has taken over in many schools as students tend to learn better with the aid of audiovisual technology. Although human interactions can't be excluded in making the learning process more inclusive, recorded lectures have more potential than live and physical classes. Recorded lectures can be revisited occasionally, carefully scrutinized, replace class lessons, and save time.
This article is an ultimate step-to-step guide on how to record lectures with a brand new video for communication concept. This includes what is needed to record a lecture, such as platform like Vidnoz Flex and gadgets like a microphone, mobile phone or camera; how to record class lectures seamlessly with the aid of the instruments as mentioned earlier and more.
On This Page
What are Needed to Record Lectures
Prepare Hardware & Software Equipment to Record Lectures
Setting Up the Recording Environment
How to Record Class Lectures (Mac, iPhone, Android)
FAQs about Recording Lectures
Q: How to record lectures on iPhones?
Q: How to record a video lecture on a laptop for free?
Q: What is the best way to record lectures?
Q: Can I record my professor's lecture?
Q: Is recording class lectures illegal?
Conclusion
What are Needed to Record Lectures
There are two important requirements needed to record lectures which involve:
Equipment (hardware and software components).
Environment in which you record the lectures.
Also read: Try text to speech if you want to convert your text into audio.
Prepare Hardware & Software Equipment to Record Lectures
In preparation for the equipment to record lectures, here's a list of what to check out before using the kit:
★ Microphones: Choose a high-quality microphone that captures clear audio from the recording device or an external one. Consider using a lapel microphone because in-built mics produce relatively low-quality audio compared to external mics mentioned earlier. Ensure to test the mics before use to consider the quality. Remember: try mic test before starting a record.
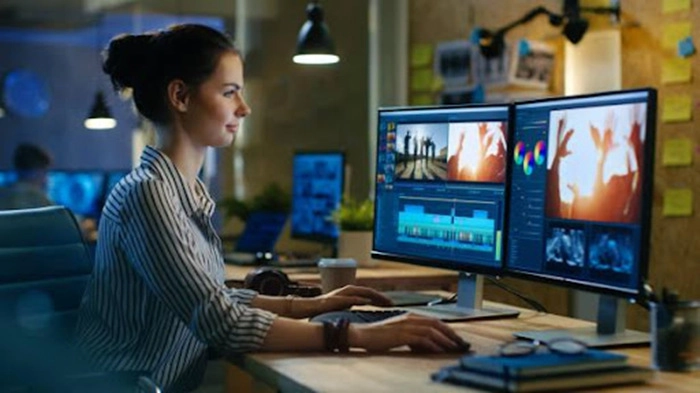
★ Recording software or devices: Select best video recorder or devices that suit your needs. Recording software helps transform raw videos into dynamic resolutions, add compelling video messaging and CTAs to your videos, create a wide range of content, and provide technical assistance in recording bugs and issues. A competent and reliable software that exhibits this feature and more is Vidnox Flex.
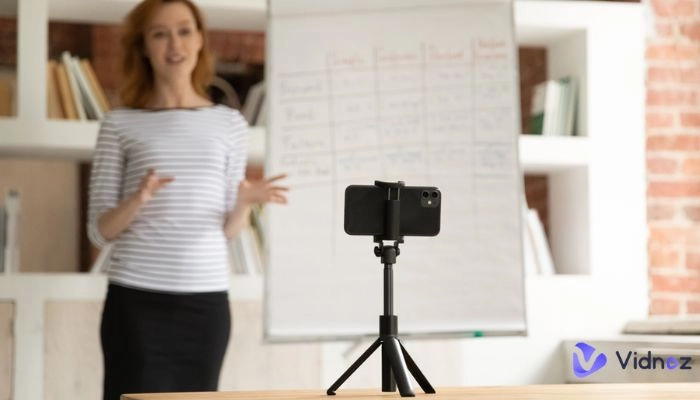
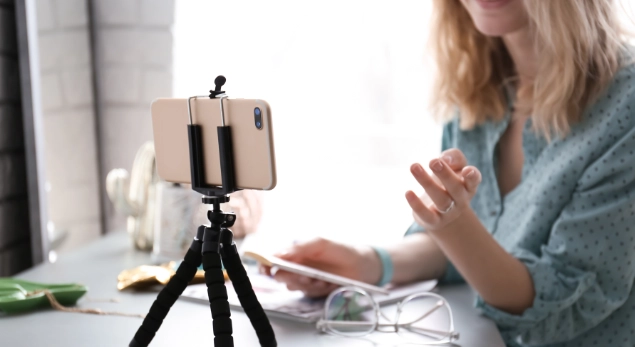
★ Camera (optional): If you opt for record webcam online, ensure you have a camera capable of capturing clear visuals. Also, ensure it has a stable tripod or mount for steady footage or recording.
Vidnoz Flex - Inclusive Video Creation & Automation Platform
Create, customize, share, and track videos. Gain all faster with 2X speed!
Record, upload and edit videos with built-in video recorder editor.
Add CTA button, polls and user forms that enhance interaction.
Share your videos to mainstreaming platform in batches.
Track your video performance with in-depth insights.
Setting Up the Recording Environment
★ Choose a quiet place: To record a lecture requires utmost serenity and minimal to no noise so as not to distract you and also affect the quality of your recording. The audio in your lecture video can be affected by AC, humming equipment, laptops with loud fans, and even noise outside the room.
★ Ensure proper lighting: Ensure the recording area is well-lit with natural or artificial lighting. Also, avoid too bright locations like recording the lecture behind an exposed window.
★ Test the camera and microphone for optimal recording: Do not make the mistake of not backtesting the camera and microphone before recording. You could waste your time and effort if they work out differently than expected. Test the camera angle and frame to ensure the lecturer is clearly visible within the video frame.
How to Record Class Lectures (Mac, iPhone, Android)
Step 1. Plan & Organize the Lecture Content
Before you even start to record a lecture, choosing where to start recording and places to take notes are vital. It would be best to have a structured outline or presentation covering the key topics you want to address. You can opt to use the whiteboard feature of MioCreate to prepare your presentation materials visually.
Sign in to the Vidnoz Flex website. Set up the required recording settings (camera or microphone) first, or if you prefer, you can write a script on the teleprompter in advance. Adjust the recording settings, including the resolution, and audio quality, according to your preferences and hardware capabilities. Then choose the screen size you intend to screen record with audio. Once all these are done, then click Start Recording.
Step 3. Start Recording Lectures
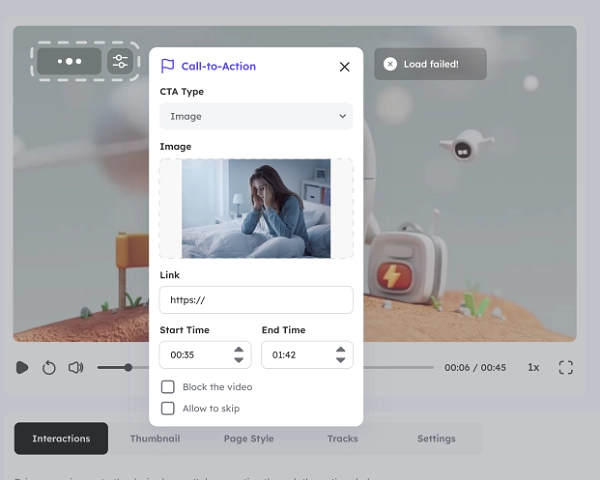
After you have clicked the start recording button, users can use Pen to take notes in recordings. The MioCreate whiteboard, which can be shared while recording, can be used to present ideas to the learners. The teachers can add interactions in the video, including adding polls, creating user forms, and other CTAs designs.
Step 4. Stop Recording Lectures and Start Editing
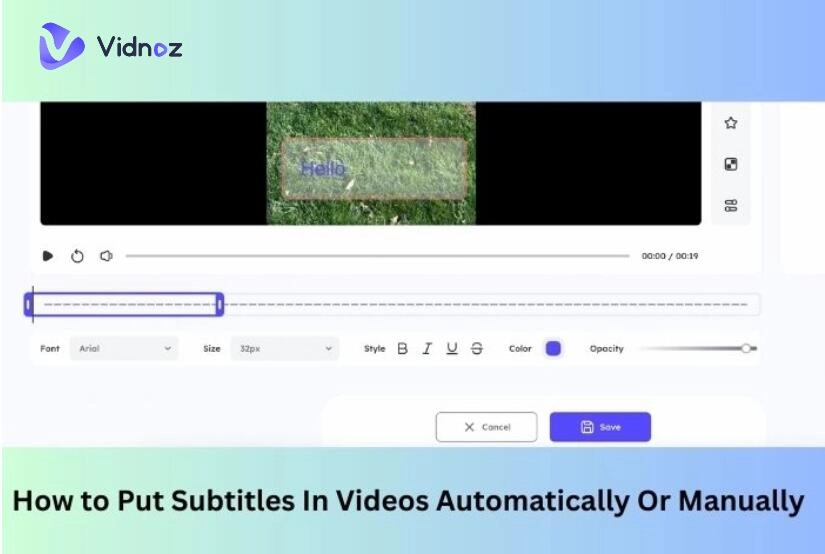
It's noteworthy that you understand that the free version only allows for a 30-minute limit. After you finish the lecture, you will easily find it beneath your device to pause or stop recording. Proceed to the video editing features of Vidnoz Flex to refine your recorded lecture. Crop or trim any unwanted sections, add annotations or captions and insert relevant images or visuals to enhance the educational content you must have provided. Take advantage of the editing tools provided by Vidnoz Flex to create a polished final video.
Facilitate Communication with Videos
Make communicate asynchronously and enhance team collaboration effectively.
Step 5. Share Lectures via Multiple Approaches
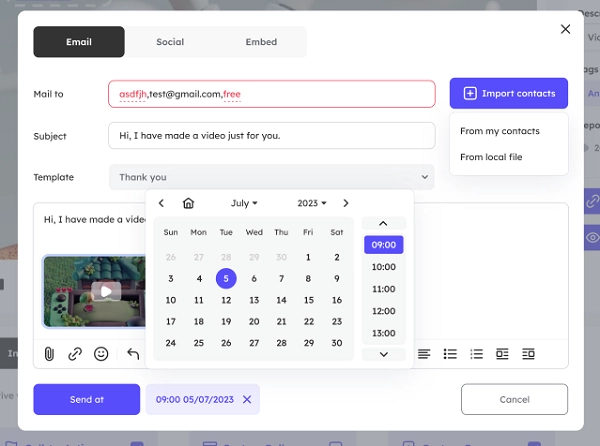
To share the edited version of your recorded content, vidnoz flex allows for three different options, which include email, enabling direct communication with students, The social sharing feature of Vidnoz Flex to reach a wider audience through platforms like YouTube or social media, and Embedding the videos in a learning management system or website is another effective approach to make the lectures easily accessible to students (Email, Social, and Embed).
Step 6. Track & Analyze Recorded Lectures
Vidnoz allows users to monitor metrics such as views, viewership patterns, and comments to gain insights into how students engage with your content. Use this information to identify areas for improvement and make adjustments for future lectures accordingly.
FAQs about Recording Lectures
Q: How to record lectures on iPhones?
Step 1. Record & Create Lectures with Vidnoz Flex: Visit official website and log in. Navigate to the "Create a video" panel and tap the Start Recording button on your iPhone to start recording your lecture.
Step 2. Edit Recordings: After finishing the lecture, use the editing features in Vidnoz Flex to edit your recording. Trim unwanted parts, add annotations if needed, and ensure the video is well-edited to your taste.
Step 3. Share Lectures: Once you're satisfied with the recording, tap the share button in Vidnoz Flex. Choose your preferred sharing method, such as email or social media, and send the lecture to your desired audience.
Step 4. Monitor Engagement: Access the Vidnoz Flex analytics to monitor engagement. Track views, comments, and other metrics to gauge how your lecture is being received by viewers, allowing you to make informed improvements for future recordings.
Q: How to record a video lecture on a laptop for free?
A: Use free software like OBS Studio or Vidnoz Flex, as discussed earlier. Install the software on your device, adjust the recording settings, start the screen recording, deliver your lecture, and save the recording for further editing or sharing.
Q: What is the best way to record lectures?
This depends on your needs and resources. Ensure good lighting, a stable setup, clear audio, and a noiseless background. They all contribute to a good outcome for your recording.
Q: Can I record my professor's lecture?
Yes, you can, but it depends on your institution's policies. Obtain permission before taking such decisions.
Q: Is recording class lectures illegal?
Legality depends on the location's policies and laws. Confirm the policies and local laws and comply.
Conclusion
To record lectures effortlessly on your device using Vidnoz Flex is now easy based on the advancement of technology. It is a free and effective internet tool for creating videos with many exciting features. Recording a lecture on the go has never been more straightforward and effective than now. Remember to position your camera, edit your recordings within the app, share your recorded lectures easily via email, social media and websites, and monitor viewer engagement with the built-in analytics. Use vidnoz flex now and experience your best video recording ever now!
Tim is an SEO content writer and an IT researcher with over 10 years of professional experience. Specialized in software reviewing and IT content writing, he has helped tens of thousand readers solve tech-related problems.

![[Pros and Cons] Best 8 Screen Recorders for Chrome in 2026 You Cannot Miss](https://www.vidnoz.com/bimg/screen-recorder-for-chrome-1.webp)

![How to Cut a Video with a Video Trimmer for Free [2026 Expertise Guide]](https://www.vidnoz.com/bimg/how-to-cut-a-video-1.webp)