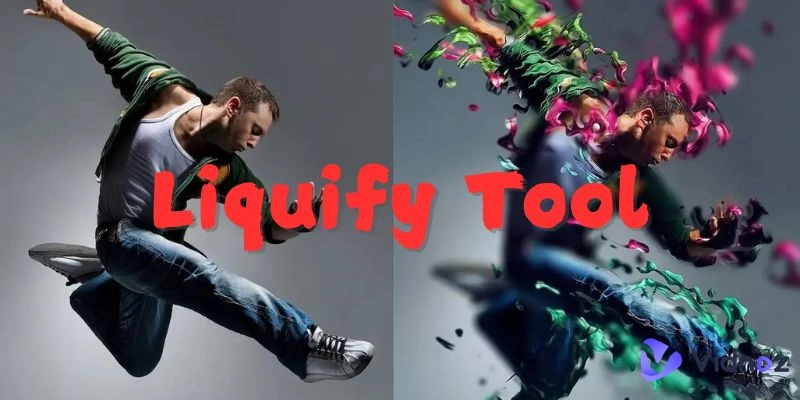
Have you ever looked at pictures edited by professionals and wondered how they turned out so flawless? With the liquify tool, you can also easily enhance facial features or add a magic twist to your pictures, just like professionals.
In this article, we will explain how to use the liquify tool in Photoshop. We will also explore the best liquify tool online available for free to use. Continue reading to start editing like a pro.
- On This Page
-
-
What is the Liquify Tool in Photoshop?
-
How to Use the Liquify Tool in Photoshop [Step-by-Step Tutorial]
Step 1: Open Your Image in Photoshop
Step 2: Access the Liquify Tool
Step 3: Understand the Liquify Feature
Step 4: Use the Forward Warp Tool for Basic Adjustments
Step 5: Refine Facial Features with Face-Aware Liquify
Step 6: Use the Bloat or Pucker Tool for Details
Step 7: Protect Areas with the Freeze Mask Tool
Step 8: Smooth Edges with the Smooth Tool
Step 9: Preview the Final Work and Save It
-
Other Free Online Liquify Tools Alternatives to Photoshop
Canva Free Liquify Tool Online
Pixlr Free Liquify Tool Online
-
How to Use Canvas Liquify Tool for Quick Edits
-
Funny Moment: Bring Your Photo to Life With AI Talking Photo
How to Make Photo Talk With Vidnoz AI
What is the Liquify Tool in Photoshop?
Photoshop liquify tool is a top-level editing feature that lets you make changes by pulling, rotating, reflecting, or bloating any area of an image.
The best thing about this feature is that it offers complete control over distortions in an image, thus perfect to be used while editing. The liquify filter is mainly used for enhancing facial features and adjusting body shapes according to your preferences. Apart from that, it can also be used to modify the other parts of an image, adding a creative and flawless touch to it.
How to Use the Liquify Tool in Photoshop [Step-by-Step Tutorial]
If you're looking to use the liquify tool in Photoshop for the first time, you may need some guidance to get started, and eventually, you will become a pro editor in no time. Follow these steps to ensure your images get the professional touch you want.
Step 1: Open Your Image in Photoshop
The first step is to launch Photoshop on your device, preferably a computer or a laptop. Open the image you want to edit. Always work on a duplicate layer to preserve the original file.
Step 2: Access the Liquify Tool
Next, click on filter, where you will see the Liquify option. Clicking on it will open the Liquify workspace, where all the magic happens.
Step 3: Understand the Liquify Feature
On the right side of the Photoshop interface, you will see customization options such as brush size, pressure, and density. Don't jump on this customization. First, familiarize yourself with what these settings do, as this will help you control your edits better.
Step 4: Use the Forward Warp Tool for Basic Adjustments
The forward warp tool lets you move pixels around like molding clay. You can adjust the brush size based on the area you're working on and drag gently to reshape features.

Image from fixthephoto.com
Step 5: Refine Facial Features with Face-Aware Liquify
Photoshop's Face-Aware Liquify feature automatically detects facial landmarks. Thus, you can easily fine-tune facial features such as eyes, nose, and overall face shape without distorting the natural look.

Image from adebe.com
Step 6: Use the Bloat or Pucker Tool for Details
The Bloat tool expands an area outward, while the Pucker tool contracts it inward. These are perfect for adjusting eyes, lips, or adding a creative touch to other images.
Step 7: Protect Areas with the Freeze Mask Tool
The Freeze Mask tool prevents specific parts of the image from being altered. This is useful when you want to keep certain details intact while manipulating others.

Vidnoz AI - Create Free Engaging AI Video with Talking Avatar
- Easily create professional AI videos with realistic avatars.
- Text-to-speech lip sync voices of different languages.
- 2800+ video templates for multiple scenarios.
Step 8: Smooth Edges with the Smooth Tool
After warping, you may find jagged or rough edges. The Smooth tool helps to polish these areas, creating seamless transitions.

Step 9: Preview the Final Work and Save It
Always preview your changes before finalizing. Once you're satisfied, click OK, save your work, and admire the magic you've created using Photoshop's liquify tool.
Other Free Online Liquify Tools Alternatives to Photoshop
Photoshop is undoubtedly an excellent choice for altering your pictures, but not all people find running Photoshop that easy and convenient. Thus, several other liquify tools online are available. Let's look at two top choices and what features they offer.
-
Canva Free Liquify Tool Online

Canva is mainly famous for graphic design, and not many know about its Liquify tool. It is the perfect way to enhance your images without having advanced skills. You can choose from one of the five Liquify effects it has to offer and apply it to your images to twist, bulge, or swirl them. The tool is quicker and easier to use than Photoshop. Moreover, Canva AI tool offers a drag-and-drop editor feature, which means you can simply upload the image, edit it, and export it in JPG or any download form you prefer.
Pros
- It is user-friendly for beginners
- Pre-set liquify effects make edits fast and easy
- The liquify feature is available with free Canva accounts
Cons
- Canva offers limited custom control over the liquify effect to Photoshop
- It is not as precise for detailed edits as Photoshop
-
Pixlr Free Liquify Tool Online

Image from pixlr.com
If you're looking for more manual control and customization, then go for Pixlr free Liquify tool. Unlike Canva, Pixlr offers advanced Liquify features such as warping, swirling, and bloating, similar to Photoshop. Apart from these features, you can also customize the brush size, blur faces in photos, and intensity. Moreover, the Pixlr Liquify tool online is web-based, which means you don't require pre-installation to access this. If you're looking for a convenient and advanced Liquify tool, then Pixlr is the one to go for.
Pros
- It offers brush-based liquify adjustments
- Provides more freedom and customization
- Completely free to use without account creation
Cons
- Its interface can be overwhelming for first-timers
Choosing between Canva and Pixlr depends on whether you prioritize simplicity or complete control when using a liquify tool online. If you're a beginner looking for an easy editing solution, go for Canva. But if you're familiar with the liquify tools and their features and want to take your editing skills to another level, try Pixlr.
How to Use Canvas Liquify Tool for Quick Edits
If you're looking for a fast and effective way to liquify images online, Canva is a fantastic option. Here's how you can use its liquify tool on Canva easily.
Step 1. Go to the Canva website and find the Liquify tool.
Go to Canva and click "Apps" at the bottom left bar. Search for the "Liquify" app and click on it.
Direct link >> https://www.canva.com/your-apps/AAGCEMq8YZo/liquify
Step 2. Upload the photo you want to make.
Click "Upload" and select your image from your device.
Step 3. Choose your desired Liquify effect from the five effects provided.
Canva offers 5 different liquify filter styles, such as wobble, melt, and flow. Preview each one and pick the effect that fits your vision. You can also change the intensity of the effects accordingly.

Step 4. Preview the photo and download it.
Once you are happy with the liquified result, download the edited photo to your device. It's that easy to liquefy images online without complicated software!
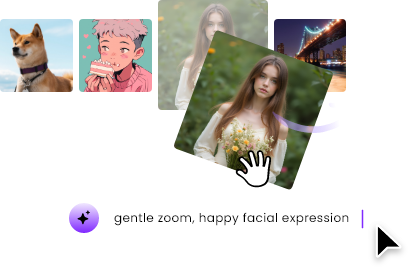
Funny Moment: Bring Your Photo to Life With AI Talking Photo
Want to take your photo editing to a whole new level? Introducing AI Talking Photo, a fun and creative way to animate a photo. You can bring still photos to life and make them talk using AI-powered software with this product. It’s more interesting than Liquify photos, as you can add voiceovers to make another one’s meme videos. And some of liquify tools also provide talking photo feature as well.

There are several online tools to bring photos to life with their AI talking photos, yet one of the most appropriate is Vidnoz AI Talking Photos. It gives you an experience that you will have fun experimenting with.
Create Your AI Talking Avatar - FREE
- 1900+ realistic AI avatars of different races
- Vivid lip-syncing AI voices & gestures
- Support 140+ languages with multiple accents
Key Feature
- Turn static people in photos into speaking the script you enter.
- Choose from different voices and languages, such as Bengali, Arabian, or American.
- It is easy to use, even for beginners, you just have to follow a few steps.
- Simply access the platform online with no pre-installation required.
- Perfect for social media, marketing, or just for fun.
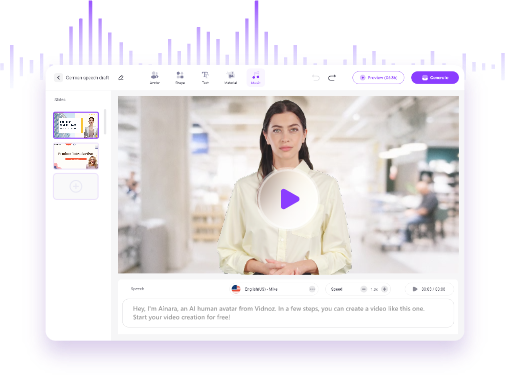
How to Make Photo Talk With Vidnoz AI
Step 1. Go to Vidnoz Talking Photo AI: Visit Vidnoz AI official website and head to 'Talking Photo AI' feature.
Step 2. Upload your chosen photo: Upload the photo of the person you want to create a talking video of.
Step 3. Customize changes: Customize the settings, such as voice, language, and tone. Also, add the script.
Step 4. Generate the Video and Save: Once you're done with settings, click on 'Generate.' Once the video is generated, you can preview it and save it to share on social media.
Conclusion
The liquify tool offers endless possibilities for editing. It is challenging to navigate this feature initially, but once you get your hands right, your editing skills will improve dramatically. While the liquify tool in Photoshop is mostly the go-to tool, Canva and Pixlr are also becoming popular. After reshaping and editing your images, you can bring them to life with Vidnoz AI Talking Photo. Play around with the liquify tools we mentioned today.