Every photographer, whether amateur or pro, has faced this: you capture a nearly perfect shot, only to find an awkward object, random people, or background clutter ruining the moment. Cropping can help, but it often cuts out important parts of your photo. Fortunately, the Content Aware Fill feature in photo editing software offers a smart, time-saving way to remove unwanted elements without leaving empty holes or unnatural patches.
This article will explain what AI Content Aware Fill is, how it works in Adobe Photoshop, provide a step-by-step guide for using it, and introduce you to easier AI-powered alternatives that require no technical skill. By the end, you’ll know how to clean up photos like a pro and even explore fun creative extensions. Let’s get started.
- On This Page
-
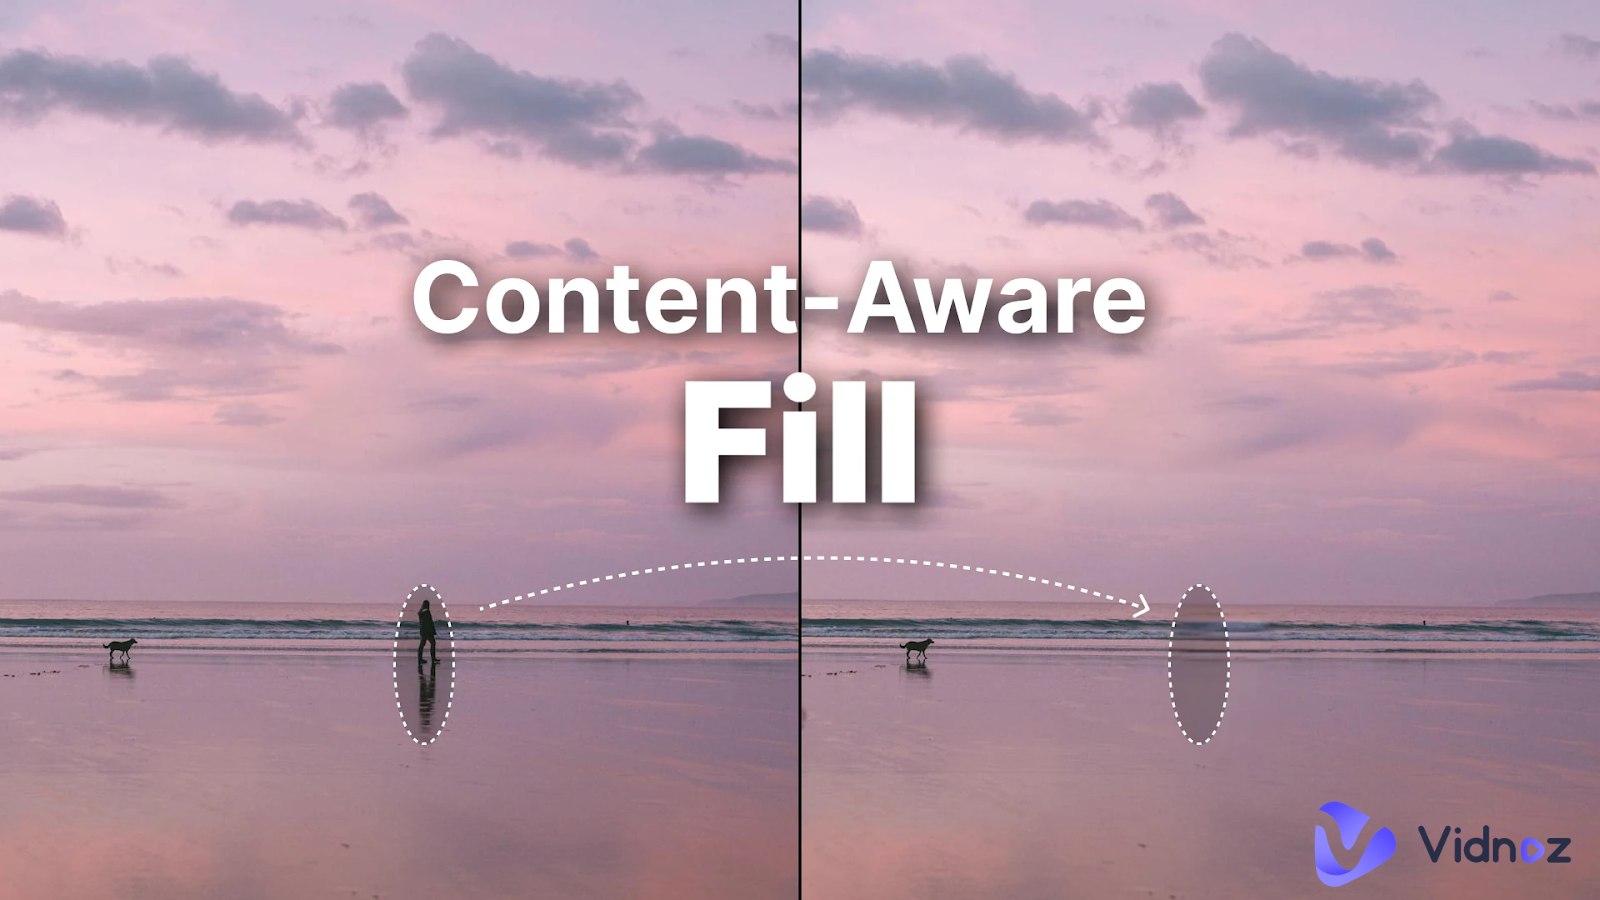
Quick Overview: What is Content Aware Fill?
-
Stepwise Guide: How to Use Content-Aware Fill in Photoshop
-
Tips to Get More Natural Results with Content Aware Fill
-
Easier Content Aware Fill Alternative: Chat to Erase Unwanted Items with AI
How to Remove Objects with AI Chat
-
Final Comparison: Content Aware Fill AI or Alternatives?
-
Explore More Fun: Bring a Cleaned-up Portrait to Life
How to Create a Talking Photo Video
Quick Overview: What is Content Aware Fill?
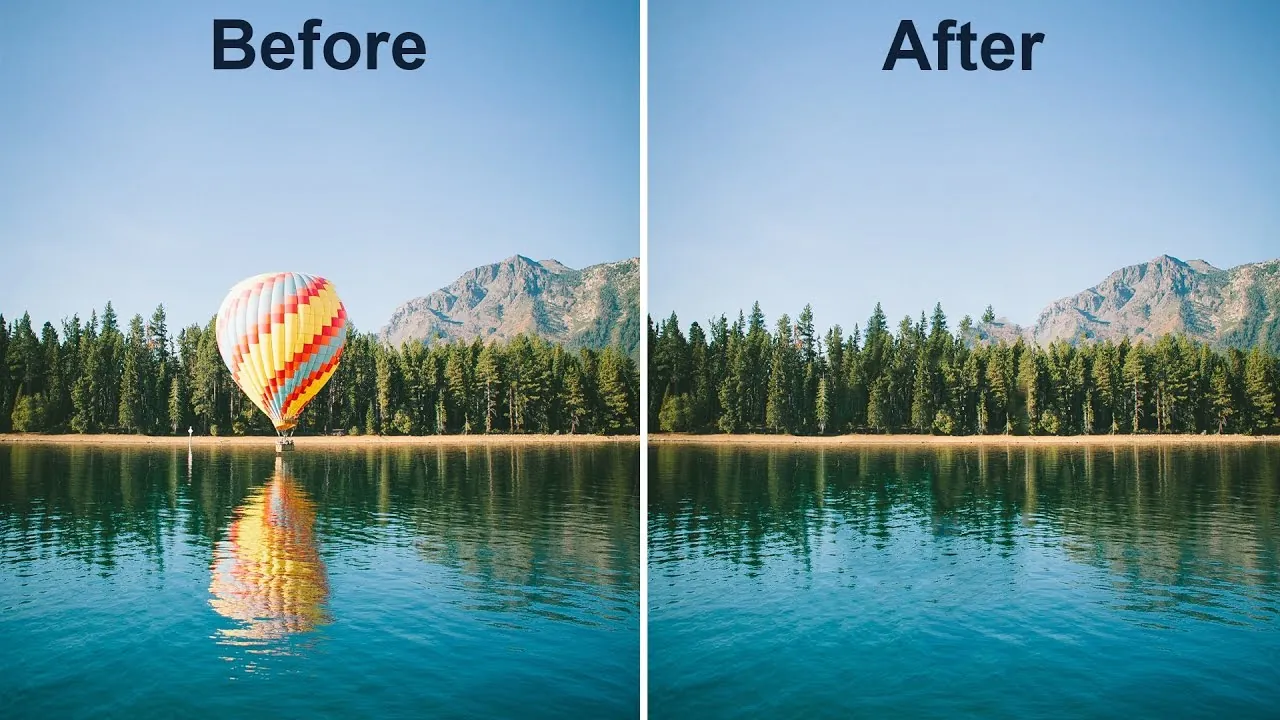
Well, Content Aware Fill is an advanced image editing tool that analyzes the pixels around a selected area and fills it in with matching background data so that the edit looks seamless. Originally popularized by Adobe Photoshop, this feature uses intelligent algorithms to reconstruct areas where unwanted objects once were.
Rather than manually cloning parts of an image (as with older tools like the clone stamp), Content Aware Fill automatically blends colors, textures, and patterns from adjacent areas to produce a more natural result. It can also be used as an image extender to remove incomplete edges after items are removed.
Stepwise Guide: How to Use Content-Aware Fill in Photoshop
Below is a step-by-step walkthrough on how to use Content Aware Fill in Photoshop, including helpful tips to achieve professional-looking results.
Step 1: Open Your Image
Launch Adobe Photoshop and open the photo you want to edit. Make sure the image is a high-resolution version for best results.
Step 2: Select the Object You Want to Remove
Use the Object Selection Tool, Lasso Tool, or Quick Selection Tool to loosely select the unwanted object or person.

Leaving a little space around your selection helps Photoshop sample nearby textures more effectively.
Step 3: Open the Content Aware Fill Workspace
With the selection active, choose Edit > Content-Aware Fill from the top menu. This opens a dedicated workspace showing a live preview of the fill result.
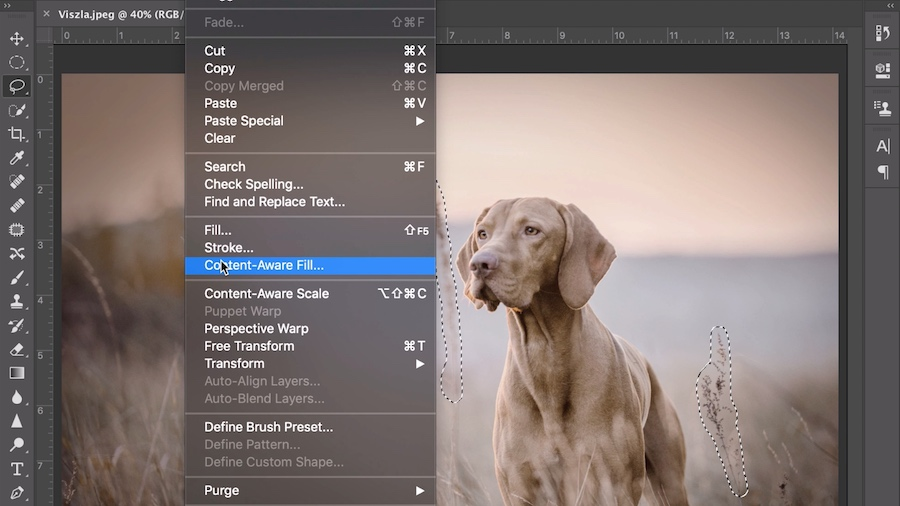
Step 4: Refine and Apply
Photoshop will highlight the sampling area, the parts of the image it will use for reference. You can adjust the sampling region and settings on the right panel to improve results. When you’re happy, click OK.
Tips for better results:
- Output to a new layer so you can tweak later.
- If edges still look off, use the Spot Healing Brush to refine small areas.
This method gives you strong control, but requires some skill in selecting and refining.
Tips to Get More Natural Results with Content Aware Fill
To achieve professional-looking edits, it’s important to follow a few best practices when using Content Aware Fill. Here are some practical, easy-to-apply tips:
- Make clean and accurate selections
Avoid jagged or overly tight selections. Leave a small margin around the object so Photoshop has enough surrounding data to work with.
- Include enough background context
The more relevant background pixels the tool can sample, the more realistic the filled area will look, especially in complex scenes.
- Check for repeated patterns
After applying the fill, zoom in and inspect areas like grass, walls, skies, or wood textures for obvious repetition or distortion.
- Refine with healing tools if needed
Use the Clone Stamp or Spot Healing Brush to smooth out small imperfections and blend edges naturally.
If this process feels time-consuming or technical, don’t worry, there are easier Content Aware Fill alternative solutions using AI tools that require far less manual effort, which we’ll explore next.
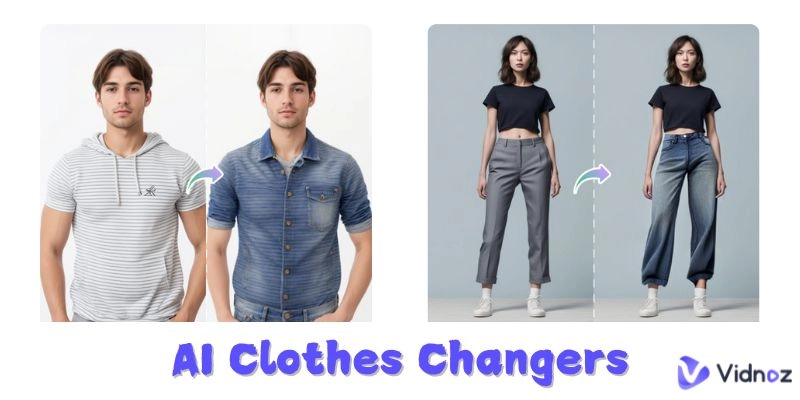
Easier Content Aware Fill Alternative: Chat to Erase Unwanted Items with AI
If the traditional Content Aware Fill workflow feels complex or time-consuming, you might prefer using an AI-powered photo editor that lets you remove unwanted objects simply by describing your intent in words. The Vidnoz AI Photo Editor provides a modern, intuitive way to edit images without manual selection or technical skills.
You can instruct the tool to “remove the trash bin from the background” or “erase the person on the left” and let the AI image generator handle the editing intelligently, making it a powerful Content Aware Fill AI alternative for everyday photographers and creators.
Here’s what makes the Vidnoz AI Photo Editor stand out:
- Remove anything in photos with just chats: Describe what you want to erase and the AI edits it automatically.
- Free & easy photo editor, no skills required: Works entirely online with no software installation or steep learning curve.
- Fast AI processing in seconds: AI interprets your text and generates the edited output almost instantly.
- Smart preserve background with no damage: The system intelligently fills missing parts to match lighting, texture, and perspective.
This tool is an excellent Content Aware Fill AI free option that’s beginner-friendly.
How to Remove Objects with AI Chat
Step 1. Visit the Vidnoz AI Photo Editor page and upload your image.

Step 2. Enter a text instruction such as “Remove the slippers from behind the dog.”
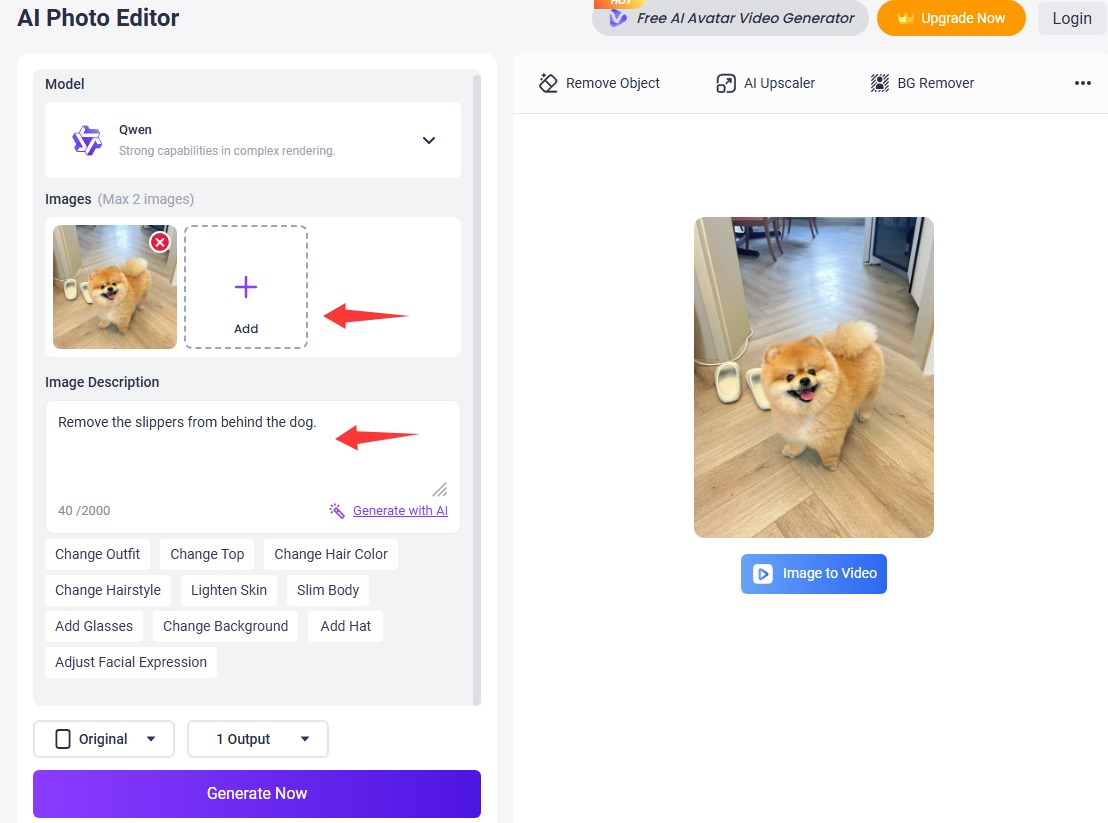
Step 3. Hit the Generate Now button and let the AI remove unwanted objects from the photo, then preview and download the clean image.
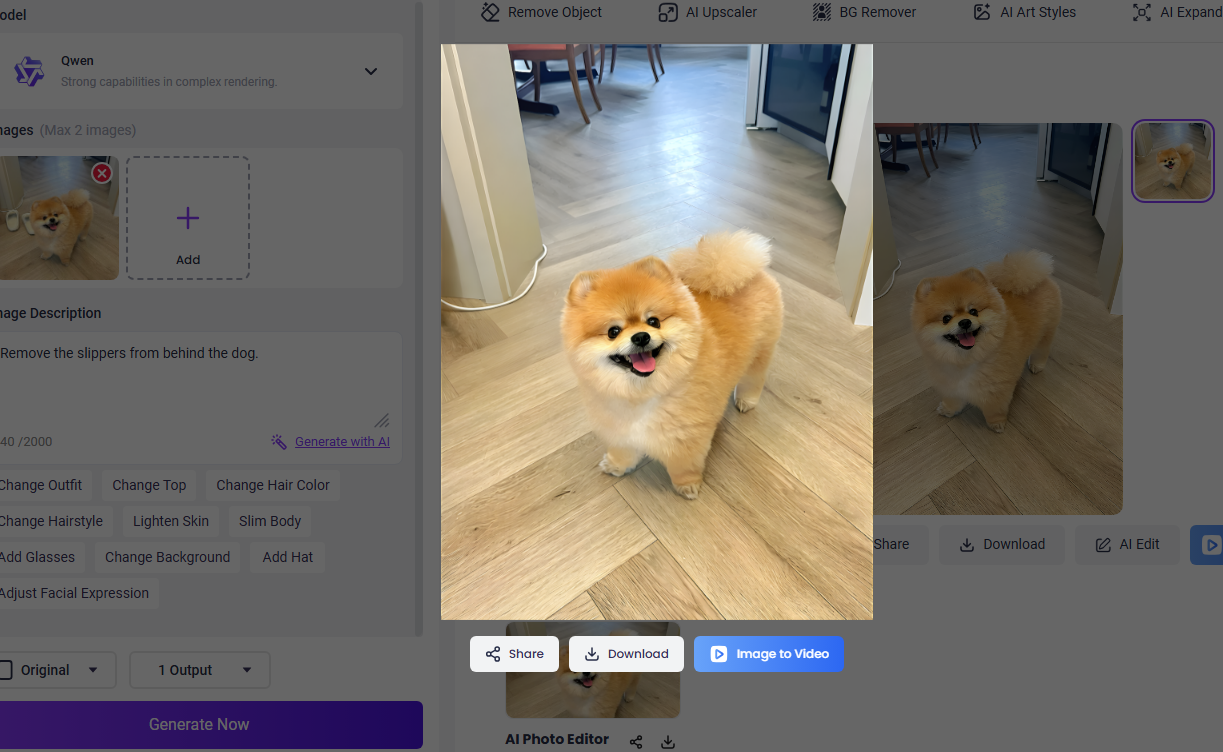
This method eliminates manual selections and delivers clean results fast, perfect for social media images, product photos, and quick edits.
Final Comparison: Content Aware Fill AI or Alternatives?
Now that you understand both traditional and AI-based methods, let’s compare them to help you choose the best approach:
| Tool Name |
Best for |
How to Erase |
Difficulty |
Effect |
| Content Aware Fill (Photoshop) |
Designers & professionals |
Manual selection + fill |
Medium-High |
Detailed control
|
| Vidnoz AI Photo Editor |
Beginners & casual users |
Text prompts + AI processing |
Very Easy |
Fast & clean |
Choose Photoshop when you want precise control and are comfortable editing. Use the Vidnoz AI provided photo editor when you want fast, easy results without technical hoops.
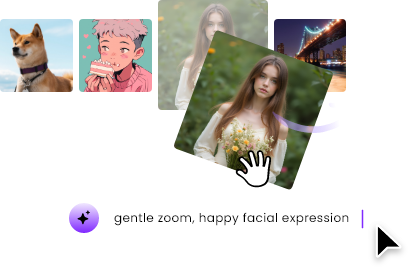
Explore More Fun: Bring a Cleaned-up Portrait to Life
Once you’ve cleaned up your portrait using tools like Content Aware Fill or AI editors, you can take it a step further by creating a fun or engaging talking video from that image. With Vidnoz AI Talking Photo, you can animate a static portrait so it speaks your script with realistic lip sync and voiceovers, all powered by artificial intelligence.
How to Create a Talking Photo Video
Step 1. Upload a high-quality, front-facing cleaned portrait photo. Clear lighting and an unobstructed face help the AI detect features accurately.
Step 2. Enter the text script you want your portrait to speak. You can choose language, voice style, tone, and even add emotional expression.
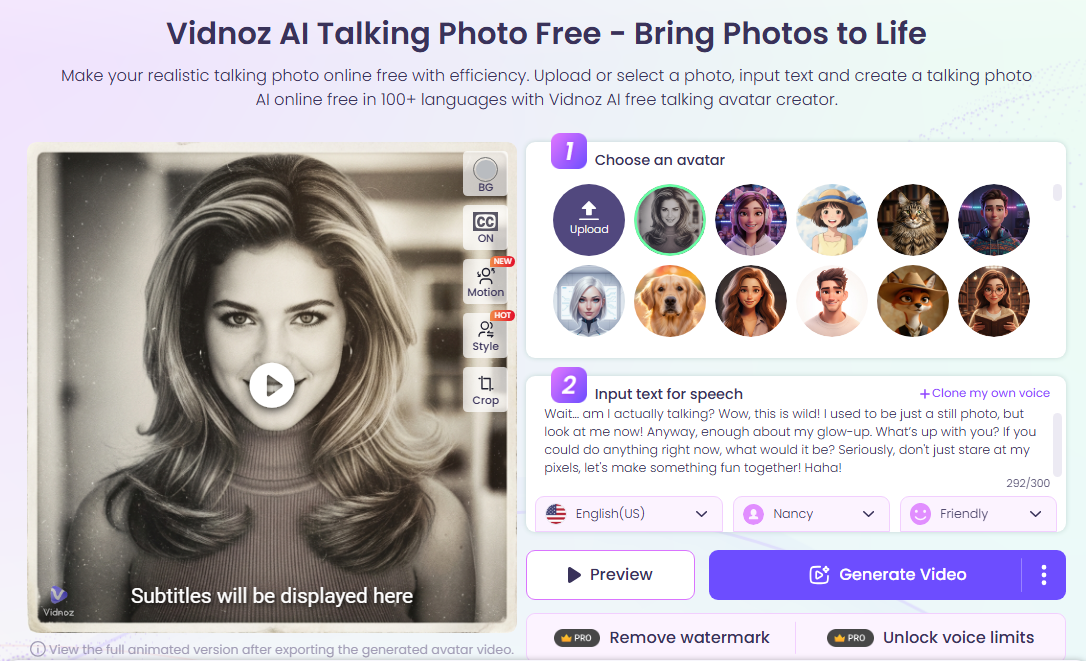
Step 3. Click Generate Video and let the system synthesize lip-synced motion and natural voice to bring your portrait to life. After processing, you can preview and download the finished talking video.
This fun extension is perfect for storytelling, greeting clips, social content, or even simple presentations, all without complex video production tools. You can even convert photo into avatar to shine your social profile.
The Bottom Line
In this complete guide, you learned what Content Aware Fill is, how to use it in Photoshop, and why AI-powered tools are making object removal easier than ever. While Photoshop offers precise control for detailed projects, Vidnoz AI Photo Editor brings a beginner-friendly, fast alternative that gets great results without technical complexity.
After cleaning up your photos, you can even turn them into expressive talking videos using Vidnoz - free AI video generator. Whether you’re a professional creator or just cleaning up vacation shots, these tools help you edit smarter and faster, so try them and elevate your photos today.

Vidnoz AI - Create Free Engaging AI Video with Talking Avatar
- Easily create professional AI videos with realistic avatars.
- Text-to-speech lip sync voices of different languages.
- 2800+ video templates for multiple scenarios.